

CladSeal Shower Trim
Cladseal Shower Trim | The Sealing System for PVC Shower wall panels
Cladseal is a bespoke sealing system that has been designed specifically for PVC Shower wall panels. The Cladseal Trim accommodates joint movement. It is this unique design and waterproofing performance that makes this trim a default recommendation from most if not all the cladding suppliers.
Cladseal uses a patented design that ensures waterproofing, accommodate joint movement and lifespan longevity.
This two part shower tray/bath sealing system comprising of a PVC strip and a high performance silicone called Sealux-N is an industry wide recommendation for sealing your panels to the bath or shower tray.
Why we recommend the CladSeal Shower Trim
1. Flexibility
The incorporation of a pre-applied silicone bond-breaker inside the strip allows substantial joint movement between the wall and shower tray or bath ledge without leaking.
2. Durability
The sealant remains protected inside the trim from the deteriorating effects of modern shower environments. Once installed, Cladseal will last for years.
3. Hygiene
Exposed silicone seals are like magnets for body-wash. When Cladseal is installed there is no exposed silicone and no mould, just a clean trim.
4. Aesthetics
Again, no exposed silicone so no mould growth. Cladseal trims are white and in most installations will compliment the colour of the ledge or wall cladding and appear as an attractive transition joint profile.


How a Cladseal Shower Trim works
The inner surface of the Cladseal strip outer leg is laminated with a sealant bond-breaker tape (green line).
Excluding the uppermost surface (x), the inner cavity walls of Cladseal are partially layered with a polythene tape indicated by the green line. Sealux-N silicone will not bond to this polythene tape. It is a silicone bond breaker !
When joint movement occurs between the wall and ledge, the Sealux-N silicone bonded to Cladseal at (x) and to the ledge at (y) comes under tension.
To reduce this build up of tension the silicone must stretch, but to stretch without restriction (like an elastic band), it must first release off the inner cavity walls of the Cladseal profile. The silicone bond breaker allows the silicone to release off the inner cavity walls and stretch to reduce the build up of tension.
How to Fit CladSeal Shower Trim

1. Mitre Cut Corners
Measure and cut cladseal strips to length. Use a mitre Cut for the internal corner and a square cut for the outer edges.

2. Clean Cut Edge
Clean cut edges of the cladseal trim with a blade.
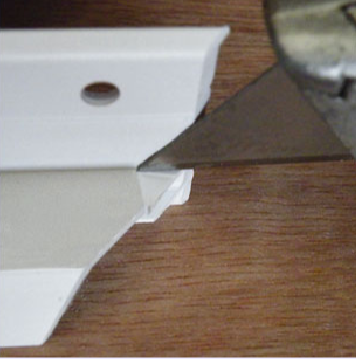
3. Notch each mitre cut
Notch each mitre cut with snips or a blade to form a square hole through meeting strips.
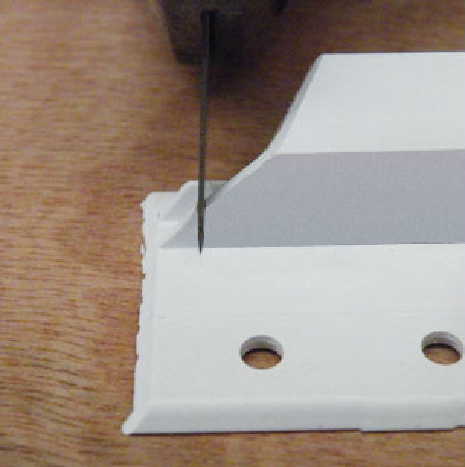
4. Notch Mitre Cut contd...
Notch each mitre cut with snips or a blade to form a square hole through meeting strips.

5. Test Cladseal strips in position to ensure they fit correctly
Place Cladseal strips in position to ensure they fit correctly.

6. Outer Cladseal Strip edge resting on the ledge?
If outer Cladseal strip edge is not resting on the ledge, score the strip with a blade and tear off removable inside leg.
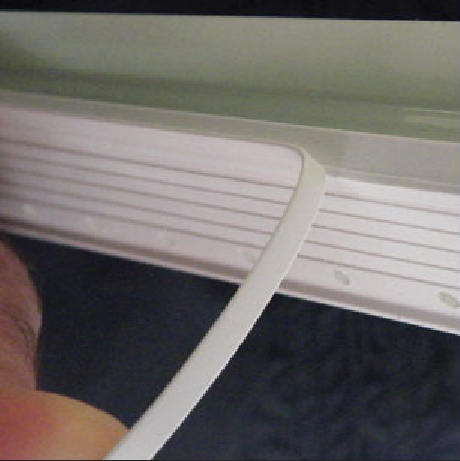
7. If required remove inside leg
If outer cladseal strip edge is not resting on the ledge, score the strip with a blade and tear off removable inside leg.

8. Strengthen with a mechanical fixing (optional)
An adhesive fixing of the strips to the wall may be strengthened with a mechanical fixing (screw/nail) if the weight of the wall panels is likely to dislodge freshly adhered strips because the adhesive/sealant has yet to cure.

9. If corner trims are being installed...
If corner trims are being installed, notch corner trim flanges so trim end rests on Cladseal strip.
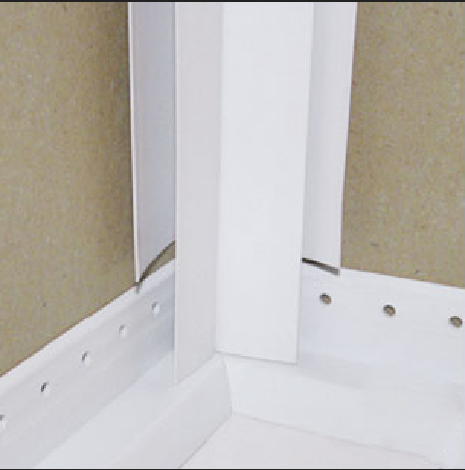
10. Notch corner trim flanges so trim end rests on strip.
If corner trims are being installed, notch corner trim flanges so trim end rests on Cladseal strip.
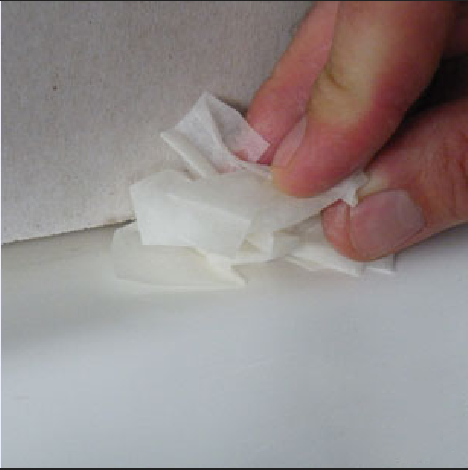
11. Wipe ledge with alcohol wipes.
Wipe ledge with alcohol wipes.

12. Mark where Cladseal strip outer edges rest on ledge
With pencil and small Cladseal strip off-cut, lightly mark where Cladseal strip outer edges rest on ledge

13. Lay a 400mm line of Sealant inside the Cladseal profile
Insert first Cladseal strip upside down into 2 mitre boxes (or similar support). Resting nozzle in Cladseal strip, lay a 400mm line of Sealux-N inside the profile.

14. Level Sealant across the Cladseal strip with spatula
Level Sealux-N across the Cladseal strip with spatula. Redistribute or add sealant as required.

15. Lay an 8mm line of Sealant on the ledge
On ledge to receive the first Cladseal strip, using finger under nozzle as support and fingertip against wall as guide, lay an 8mm line of Sealux-N on the ledge inside the strip outer edge pencil marks.

16. Lay a 5mm line of Sealant roughly 15mm over ledge
Lay a 5mm line of Sealux-N roughly 15mm over ledge.

17. Rotate the first Cladseal Strip over the joint against the wall
Rotate the first Cladseal Strip over the joint against the wall fusing the Sealux-N in the strip with the Sealux-N on the ledge.

18. Fix first Cladseal Strip to wall.
Fix first Cladseal Strip to wall. Remove surplus sealant (if any) off ledge with the square corner edge of spatula.

19. During installation butter each mitre cut
Repeat the same procedure for remaining strips. During installation butter each mitre cut slightly proud with Sealux-N to ensure sealant fuses across (inside) meeting strips.

20. Apply Sealant into notches at corners.
When fitting an internal corner trim apply Silicone Sealant into the notches in the mitred internal corner. See step 4.

21. Prepare to fit wall panels
Address the preparation and installation of wall panels and wall trims as specified by supplier.

22. Lay a line of Sealant
After panels and wall have been prepared and surfaces made ready for the panel/wall bonding process, lay a line of Sealux-N across the respective Cladseal Strip upstand as shown.

23. Cladseal Trim - Fitted
Cladseal Trim fitted in position with the correct application of sealant and a cross section to show the panel in place
How to Fit CladSeal Shower Trim | Video
What Tools & Accessories are required to fit PVC Wall Panels?
Where to buy Cladseal Trim
We recommend Panel Company for Cladseal trims…

Glen Coulson
Glen is one of our expert bloggers in bathroom design, cladding and all things DIY. If he isn’t fitting PVC panels, he’s talking or writing about PVC Panels and really should get out more.
Read his posts for the latest coverage of style trends and easy to follow guides.