

Slat wall Panels | Vox Linerio
Slat wall Panels | Vox Linerio
Slat Walls have been around for a long time but we have seen this design trend become increasingly popular over the last two years. With the advent of Slat Wall Panels this design choice is now within easy reach of everyone.
Slat Wall Panels are the perfect accent wall that can be used in any room in the house and bring wonderful colour and texture to any wall. We have outlined the benefits of the Vox Linerio Series plus go through the installation steps for the perfect wall.
Vox Linerio Slat Panels
Slat wall panels are effortlessly modern, this is a style that can add a contemporary feel to an older property or blend into a modern home with ease.
The Vox Linerio Slat Wall Panels can be used vertically, horizontally, diagonally or in a shortened panel style.

Perfect for an accent wall, a full wall or a small nook. Slat Wall Panels are incredibly versatile and will lift whatever space you choose.
Available in three sizes, with each size creating a style of its own, we have outlined the three size options below…


Choose from three lines | S, M or L
Vox Linerio Slat Panels are available in three lines – S, M or L. Each line varies by depth and width of slat and each will create its own ‘look’.
S Line
122mm Width | 12mm Depth | 2650mm Length
M Line
122mm Width | 12mm Depth | 2650mm Length

L Line
122mm Width | 21mm Depth | 2650mm Length
Vox Linerio Installation Guide
Vox Linerio | Tools you may need.
Vox Linerio Slat Panels can be installed using everyday DIY tools and the installation is very similar to traditional Tongue & Groove PVC Panels. As a general guide we recommend the following tools:
Pencil
Spirit Level
Tape Measure
Stanley Knife
Adhesive + Sealant Gun
Jigsaw
Mitre Saw
Hand Saw (fine tooth)


Vox Linerio | Installation with side trims
There are a number of methods to install Vox Linerio slat panels, the images below illustrate an installation with side trims.
1. Fit a Left Trim
Begin by fitting a left trim. Apply adhesive to the rear and offer up to position. Check for plumb and then push securely to fix in position
2. Fit Panels from Left to Right
Fit your first panel to the L trim, check for plumb then push securely to the wall. Fit the remaining panels.

3. Finish Installation with R Trim
Complete installation by fitting the R Trim securely in position.
Vox Linerio | Installation with top / bottom universal trims.
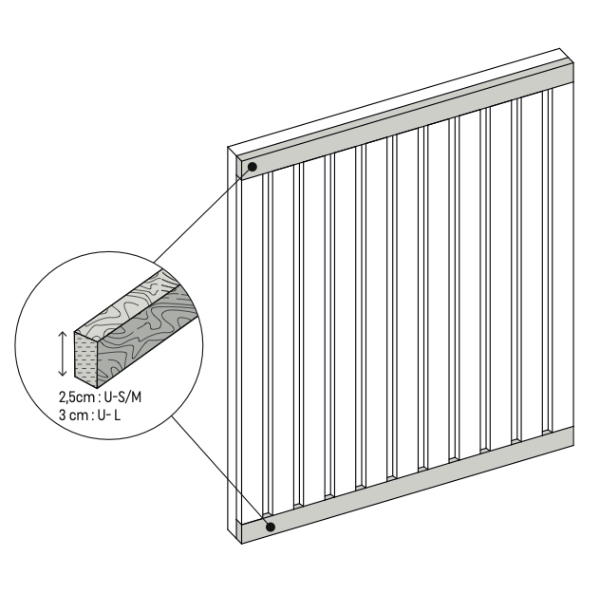
Installing with top and bottom universal trims will create a panel effect – you can go either full height (floor to ceiling) or half height.
Begin by fixing the lower universal trim in position then fit the upper universal trim at the required height – take care to ensure that both universal trims are level.
Measure the distance between lower and upper universal trims and cut your panels to the required length.
Fit the left hand panel into position, check for plumb then push firmly to secure in place.
Repeat the process with the remaining panels checking that each panel is p[lumb and true before pushing firmly to the wall.
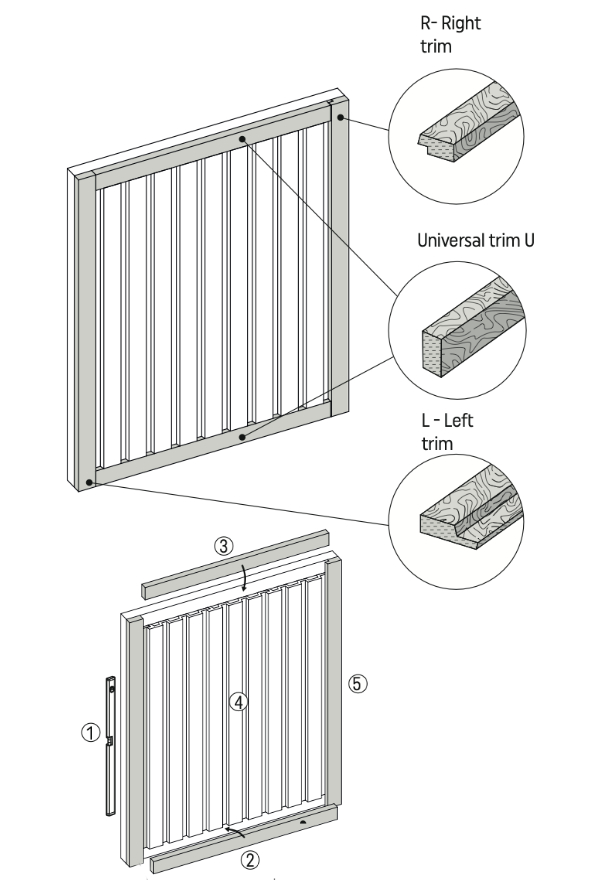
Vox Linerio | Installation with side + universal trims
Fitting with side and universal trims is the most popular installation method.
Repeat the process outlined above with side trims and lower and upper universal trims taking great care to ensure that the left trim + lower and upper are plumb and true before taking inner panel measurements.
Fit the panels within the trims as outlined above.
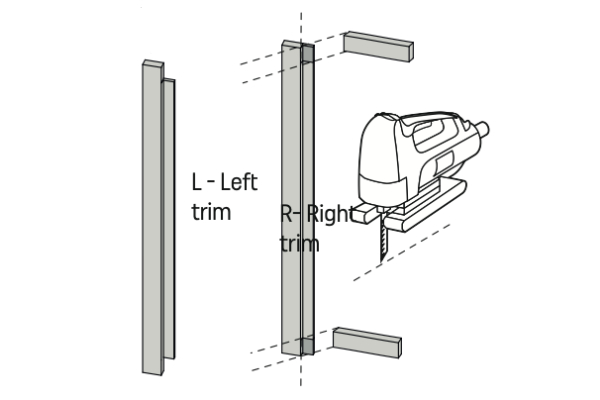
Offer up the universal trim to the lower tongue of the left and right trim, mark and then remove this section with a jigsaw or hand saw.
The universal trim will then fit within this recess.
What Tools & Accessories are required to fit PVC Wall Panels?

Glen Coulson
Glen is one of our expert bloggers in bathroom design, cladding and all things DIY. If he isn’t fitting PVC panels, he’s talking or writing about PVC Panels and really should get out more.
Read his posts for the latest coverage of style trends and easy to follow guides.